Hearty Instant Pot Chili: Your Go-To Recipe for Any Bean & Preference
When the weather turns cool or you’re simply craving a bowl of pure comfort, nothing quite hits the spot like a hearty chili. But who has hours to simmer a pot on the stove, waiting for those deep, complex flavors to develop? Enter the Instant Pot – your culinary superhero for transforming humble ingredients into a rich, robust, and utterly satisfying meal in a fraction of the time. This isn't just *any* chili recipe; it’s designed to be
the best instant pot chili recipe you’ll ever make, offering incredible versatility to suit every palate and pantry.
Forget the notion that fast means less flavor. Our Instant Pot chili delivers that coveted slow-cooked taste, with spices expertly melded and ingredients tenderized under pressure, creating a thick, bold, and comforting dish that’s perfect for busy weeknights, game day gatherings, or effortless meal prep. It's a true one-pot wonder that you'll return to again and again.
Why the Instant Pot is Your Chili Game-Changer
The magic of the Instant Pot lies in its ability to achieve incredible depth of flavor at lightning speed. Traditional chili relies on long simmering times to break down ingredients and allow spices to truly bloom and integrate. The pressure cooker accelerates this process dramatically, creating an environment where aromatics and spices infuse deeply into the meat and beans in mere minutes. This means you get the complexity of an all-day chili without the wait, making it the ideal choice for those who crave maximum flavor with minimal effort.
Beyond speed, the Instant Pot offers unparalleled convenience. It’s a true one-pot solution, handling everything from browning your meat to sautéing your aromatics and pressure cooking the entire dish. This significantly reduces cleanup – a major win on any busy day. Plus, the hands-off cooking after the lid is locked means you're free to tackle other tasks or simply relax while your delicious chili cooks itself. For more quick tips and to get slow-cooked flavor fast, check out
Quick Instant Pot Chili: Get Slow-Cooked Flavor Fast with These Tips.
Crafting Your Perfect Chili: A Deep Dive into Ingredients
The beauty of this recipe lies in its foundational elements and the endless possibilities for customization. While we start with a classic combination, each ingredient plays a crucial role in building that award-winning flavor profile.
The Foundation: Lean Ground Beef and Aromatics
Our chili begins with
1 pound of lean ground beef. While you could use a fattier cut, lean beef ensures your chili isn’t overly greasy. The key here is proper browning. Sautéing the beef until it's deeply browned and crumbly is essential for developing rich, savory notes through the Maillard reaction. Don't rush this step! After browning, draining any excess grease is important for a cleaner, less oily chili.
Next, we build our flavor base with
1 large diced onion and
4 cloves of crushed garlic. These aromatics are sautéed until softened, creating a sweet and pungent foundation that will carry the chili's spice profile. A touch of salt at this stage helps draw out moisture, intensifying their flavor.
The Flavor Architects: Spices and Seasonings
This is where the magic truly happens. Our core spice blend includes:
*
¼ cup chili powder: The backbone of any good chili, providing earthy warmth and a gentle heat.
*
1 tablespoon ground cumin: Adds a distinct, savory, and slightly smoky flavor that is quintessential to chili.
*
1 teaspoon dried oregano: Contributes a robust, aromatic, and slightly bitter note that balances the richer flavors.
A professional tip for maximizing flavor: After sautéing the aromatics, create a small well in the center of the pot and add your dry spices. Let them "bloom" for about 30 seconds in the hot oil before stirring them into the onions and garlic. This brief toasting intensifies their aroma and flavor, making your chili truly pop. For those looking to elevate even further, consider adding a pinch of smoked paprika for depth or a tiny amount of unsweetened cocoa powder for a rich, mysterious complexity.
The Heart of the Matter: Beans and Tomatoes
This is where the "versatile for any bean & preference" aspect truly shines! Our base recipe calls for
4 (15 ounce) cans of kidney beans, drained. Kidney beans are a classic choice, offering a robust texture and slightly sweet flavor. However, this is your chili, and your choice of beans can dramatically alter the experience:
*
Black beans: Offer a creamier texture and earthy flavor.
*
Pinto beans: Provide a mild, nutty taste and tender consistency.
*
Red beans: Similar to kidney beans but often smaller, with a firm texture.
*
Mixed beans: Don’t be afraid to combine a few varieties for varied textures and flavors!
If you prefer to use
dried beans, there's no need to presoak them when using the Instant Pot. Simply substitute 2 cups of dried beans for the canned ones and increase the pressure cook time to 30 minutes. Ensure your dried beans aren't too old, as this can prevent them from softening adequately. For extra tender beans, you can extend the cook time to 45 minutes. When using dried beans, you'll also want to increase the liquid, using about 2 cups of beef broth instead of water, adding another layer of flavor.
For the tomato base, we use
1 (28 ounce) can crushed tomatoes and
2 tablespoons tomato paste. Crushed tomatoes provide a rich, slightly chunky texture, while the tomato paste adds concentrated tomato flavor and helps thicken the chili. You can substitute tomato sauce for crushed tomatoes if preferred, but the paste is crucial for depth.
Step-by-Step for Success: Making the Best Instant Pot Chili Recipe
Making this chili is straightforward, even for Instant Pot beginners.
1.
Brown the Beef: Turn on your Instant Pot and select the "Sauté" function (high setting). Add the ground beef and cook, stirring occasionally, until it's browned and crumbly, about 5-7 minutes. Drain off any excess grease and transfer the cooked beef to a separate bowl.
2.
Sauté Aromatics & Bloom Spices: Pour
1 tablespoon vegetable oil into the Instant Pot. Select "Sauté" again. Add the diced onion, crushed garlic, and ½ teaspoon salt. Cook until softened, 5-7 minutes. Create a space in the center, add your chili powder, cumin, and oregano. Let them toast for 30 seconds, then stir into the onion mixture.
3.
Deglaze & Combine: Return the browned beef to the pot. Pour in
1 ½ cups water (or beef broth if using dried beans or desiring richer flavor). Stir well, making sure to scrape up any browned bits from the bottom of the pot. This is crucial to prevent a "burn" notice.
4.
Add Remaining Ingredients: Stir in your drained beans, crushed tomatoes, and tomato paste. Do not stir too vigorously after adding the tomatoes; layering them on top can help prevent the "burn" notice.
5.
Pressure Cook: Close and lock the Instant Pot lid. Select the "Chili" function and set the timer for 10 minutes (for canned beans) or 30-45 minutes (for dried beans). Allow 10-15 minutes for the pressure to build.
6.
Natural Release: Once cooking is complete, allow the pressure to release naturally for 10-40 minutes. This slow release is ideal for chili, allowing the flavors to settle and the texture to thicken beautifully. Unlock and remove the lid carefully.
Prep-Ahead Prowess: Saving Time
One of the greatest advantages of this recipe is its adaptability to meal prep. To significantly cut down on evening cooking time, consider these steps the night before:
*
Brown the Beef: Cook the ground beef, drain it, and store it in a covered container in the refrigerator.
*
Chop Aromatics: Dice your onion and crush your garlic, then place them in separate covered containers in the fridge.
*
Measure Spices: Combine your chili powder, cumin, and oregano in a small covered container.
These simple steps will shave off valuable minutes when you're ready to cook, making this the ideal fast-casual meal even faster.
Elevating Your Chili Experience: Serving & Storage
This Instant Pot chili is fantastic on its own, but its true potential is unleashed with thoughtful serving and brilliant toppings.
From Thin to Thick: Perfecting Consistency
You might notice that Instant Pot chili can sometimes be a bit thinner than stove-top versions. This is often necessary to ensure enough liquid for the pressure to build correctly. If you prefer a thicker chili, here are a few simple tricks:
*
Simmer Post-Release: After natural pressure release, select the "Sauté" function again and let the chili simmer uncovered for 10-15 minutes, stirring occasionally, until it reaches your desired thickness.
*
Mash Some Beans: For a quick fix, carefully mash about ½ to 1 cup of the cooked beans against the side of the pot with a spoon or potato masher. This releases starches that naturally thicken the chili.
*
Cornstarch Slurry: For a very thick chili, mix 1 tablespoon of cornstarch with 2 tablespoons of cold water to create a slurry. Stir this into the simmering chili until thickened.
While some prefer a thicker chili, others (like Nana LaMancuso from our inspiration) enjoy a slightly thinner consistency, especially when served over rice. The options are endless!
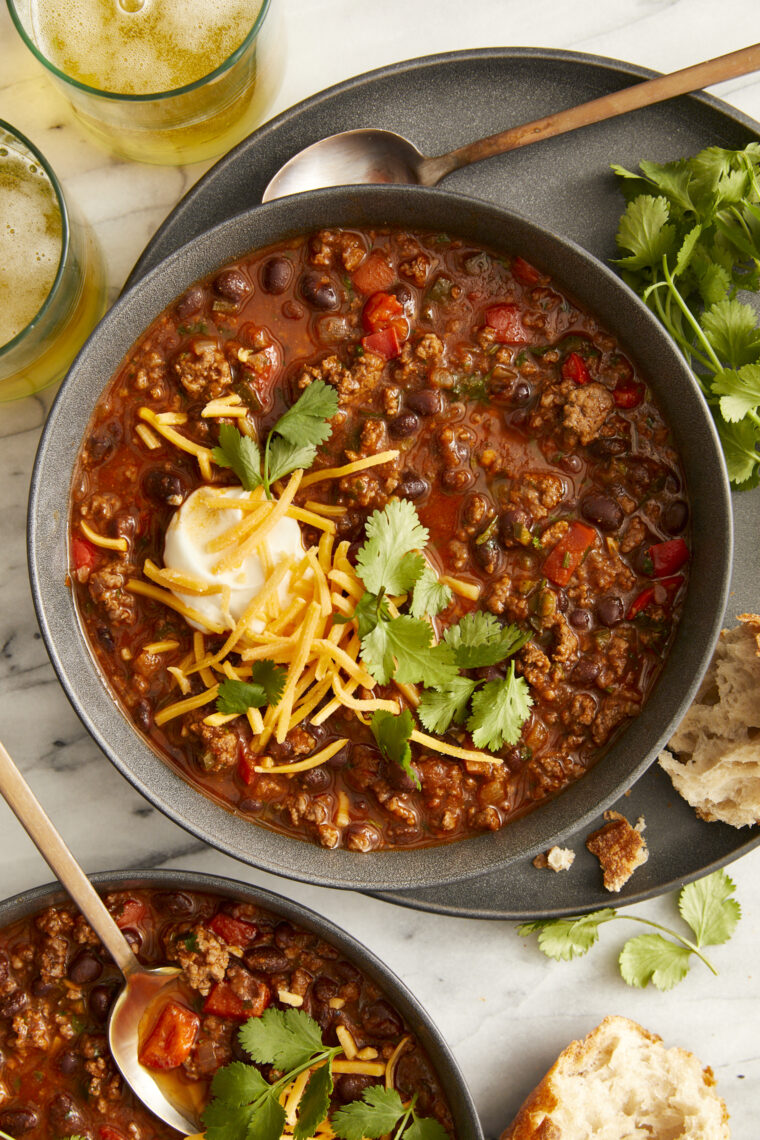
The Ultimate Chili Bar: Toppings & Pairings
A chili bar is a fantastic way to customize each bowl and add a festive touch. Offer a variety of toppings:
*
Dairy: Shredded cheddar cheese, sour cream, plain Greek yogurt, Monterey Jack.
*
Freshness: Chopped fresh cilantro, sliced green onions, diced avocado, jalapeño slices (fresh or pickled).
*
Crunch & Carbs: Crushed tortilla chips, Fritos, cornbread, saltine crackers.
*
Heat: Your favorite hot sauce, a dash of cayenne pepper.
Pair your chili with fluffy white rice, warm cornbread, or even serve it over baked potatoes or hot dogs for a truly satisfying meal.
Storage & Meal Prep
This chili is a meal prep dream! It stores beautifully in the refrigerator for up to 4-5 days, with flavors often deepening overnight. For longer storage, freeze cooled chili in airtight containers or freezer-safe bags for up to 3 months. Thaw in the refrigerator overnight and reheat gently on the stovetop or in the microwave.
Conclusion
There you have it – not just an Instant Pot chili recipe, but
the best instant pot chili recipe designed for ultimate flavor, speed, and adaptability. Whether you're a kidney bean traditionalist or a black bean adventurer, whether you love it thick or prefer it slightly soupy over rice, this recipe empowers you to create a comforting, hearty meal that truly reflects your preferences. Say goodbye to hours of simmering and hello to deep, rich, award-winning flavor in a fraction of the time. Get ready to make this Instant Pot chili a beloved staple in your kitchen! You can learn more about how this recipe earned its reputation as an award-winner at
The BEST Instant Pot Chili: Easy Weeknight Meal & Award-Winning Flavor.